LE System Flashing
💡Tip
Flashing will format the system. Please back up your data before upgrading.
镜像下载
| No. | Image Name | Version Download Path |
|---|---|---|
| 1 | A8550PF1 LE System Image | A8550PF1_LE_Image |
Switch to Flashing Mode
After the device is powered on, use a USB Type-C cable to connect the computer and the device. Connect the USB end to the computer and the Type-C end to the device.
After connecting, execute
adb devicesto list the connected devices. If none appear, wait a moment or replug the Type-C cable and execute the command again.
adb devices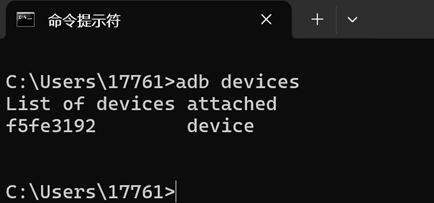
- Switch to flashing mode by executing
adb root;adb reboot edl。
adb root
adb reboot edl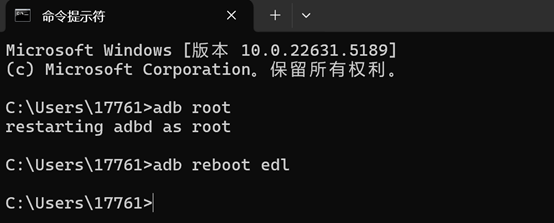
Configure QFIL Configuration Item
- Open QFIL and click Configuration > FireHose Configuration.

- In the Download Configuration window that pops up, make the following settings:
- Download Protocol: Select 0-Sahara
- Device Type: Select ufs
- Check the Reset After Download option
- Ensure all other options match the screenshot below.
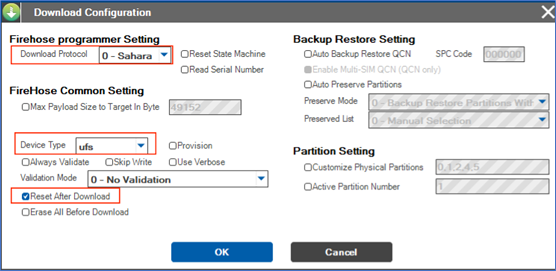
- After configuring, click
OKto save.
Select Flashing Port
Click the
Select Port option. In the pop-up window, select the available 9008 port, then clickOK.After switching modes as described in the previous section, the 9008 port should appear automatically in this window. If it does not appear, power cycle the device, perform the switching steps again, and wait for it to appear.

Select Build Type
- Locate the Select Build Type item and choose
Flat Build.

Select Flashing Files
Extract the ROM file. Using version "A8550PF1_LE_0522_v1_debug" as an example.
Find the "Select Programmer" item, click
Browse...next to Programmer Path, navigate to the extracted ROM folder, and select the extracted ROM file.
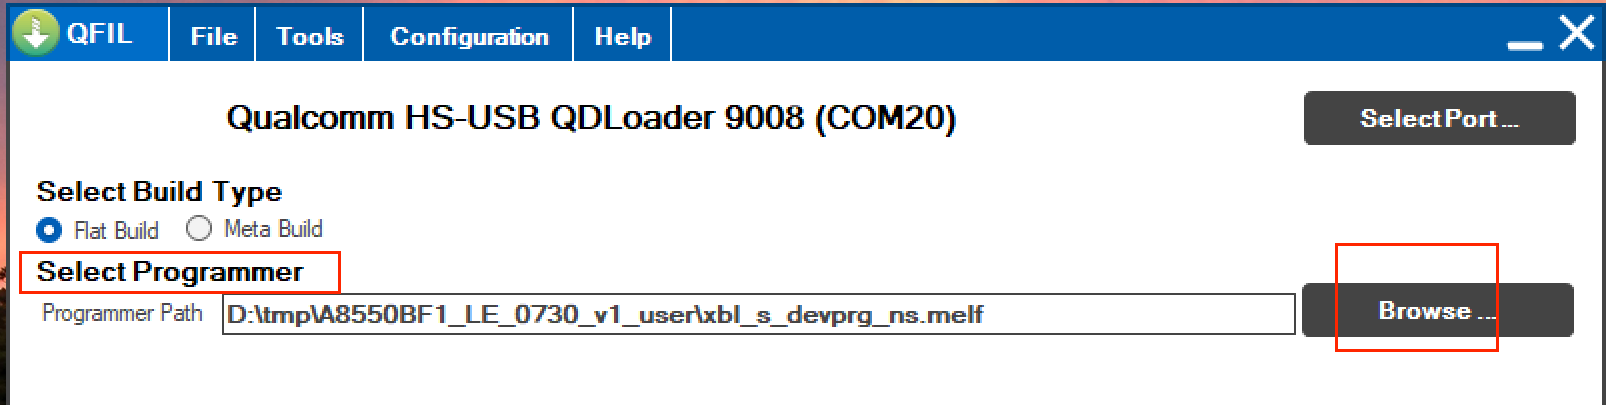
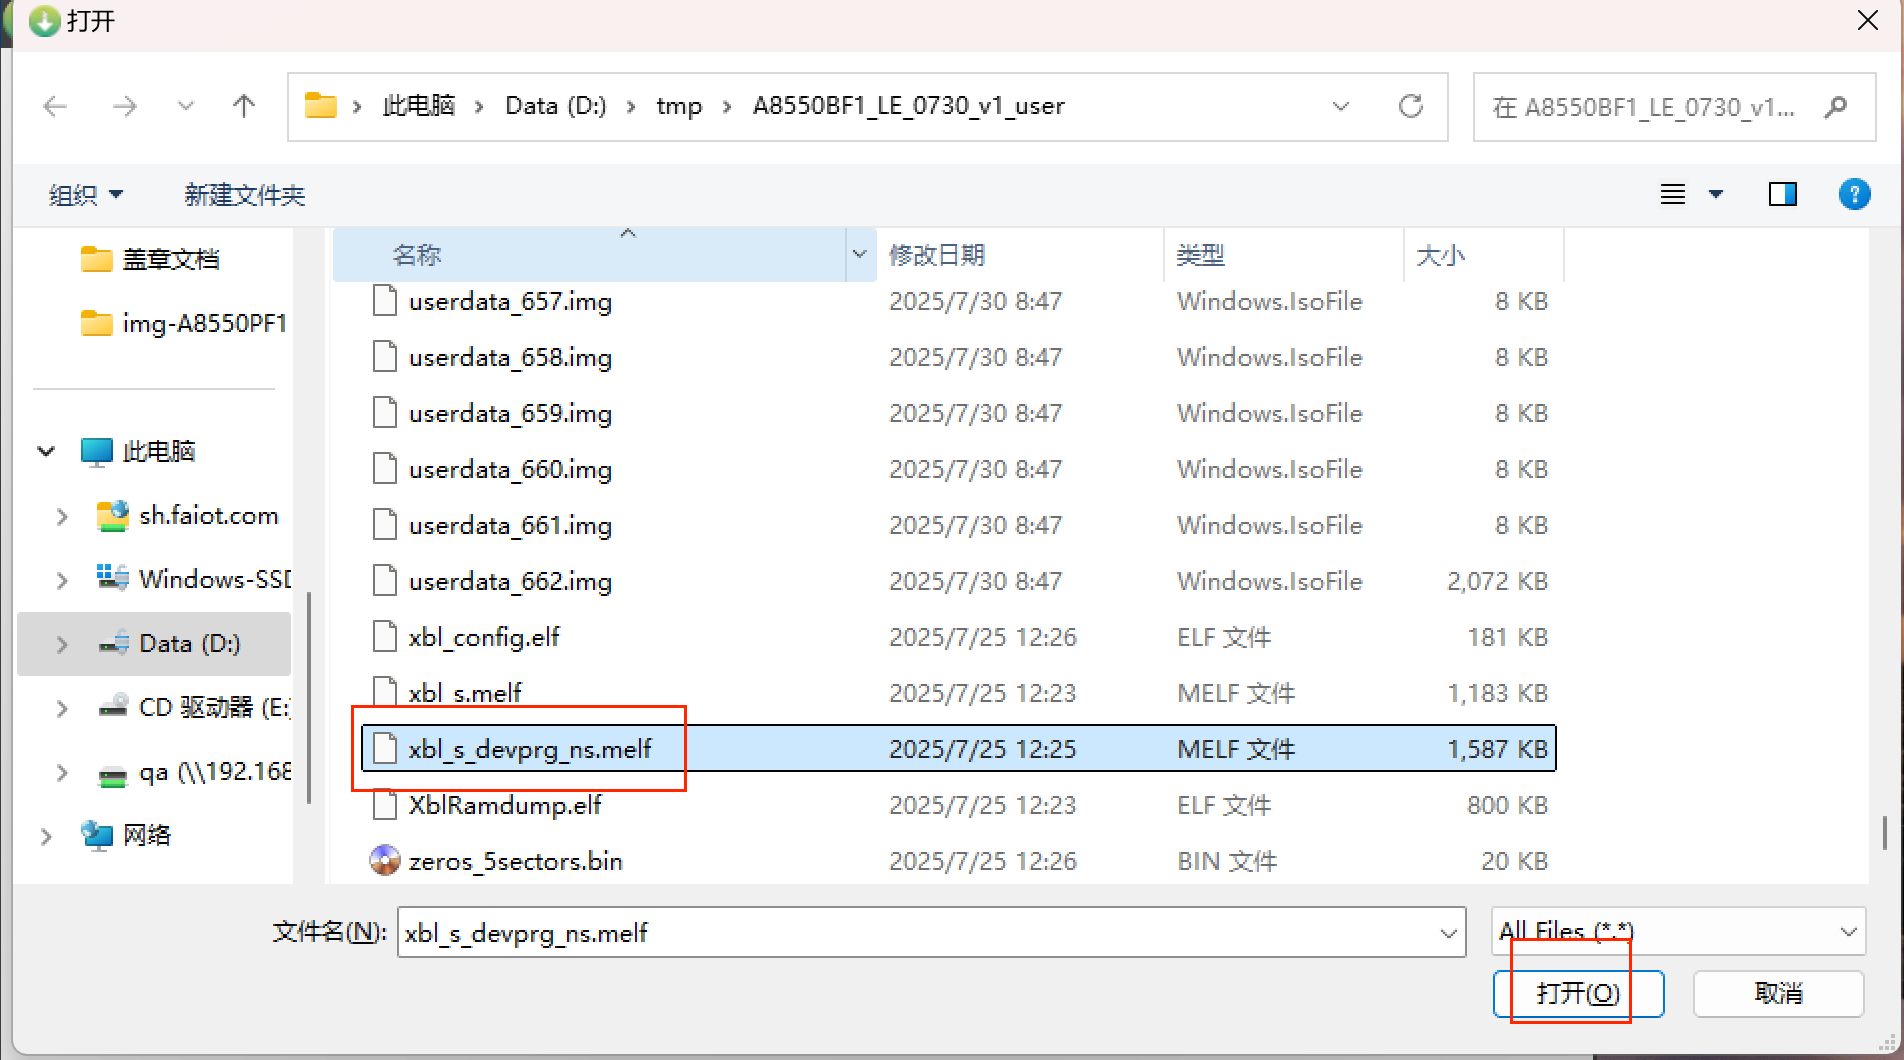
- Change the file view filter to All Files(.).
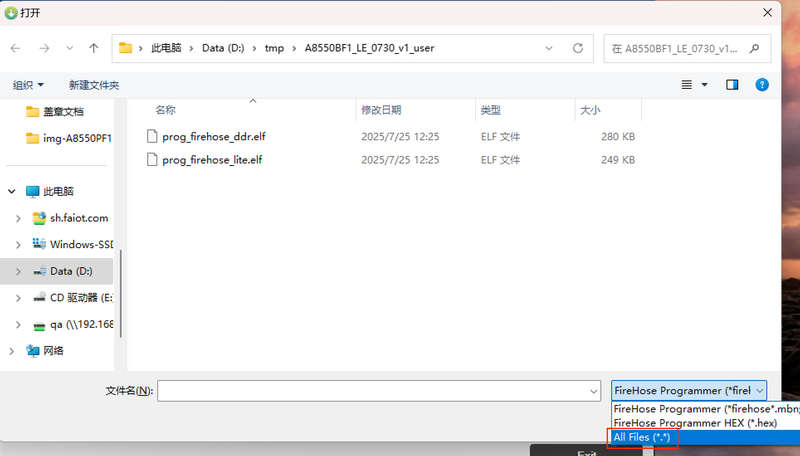
- Select the
xbl_s_devprg_ns.melffile and clickOpen.
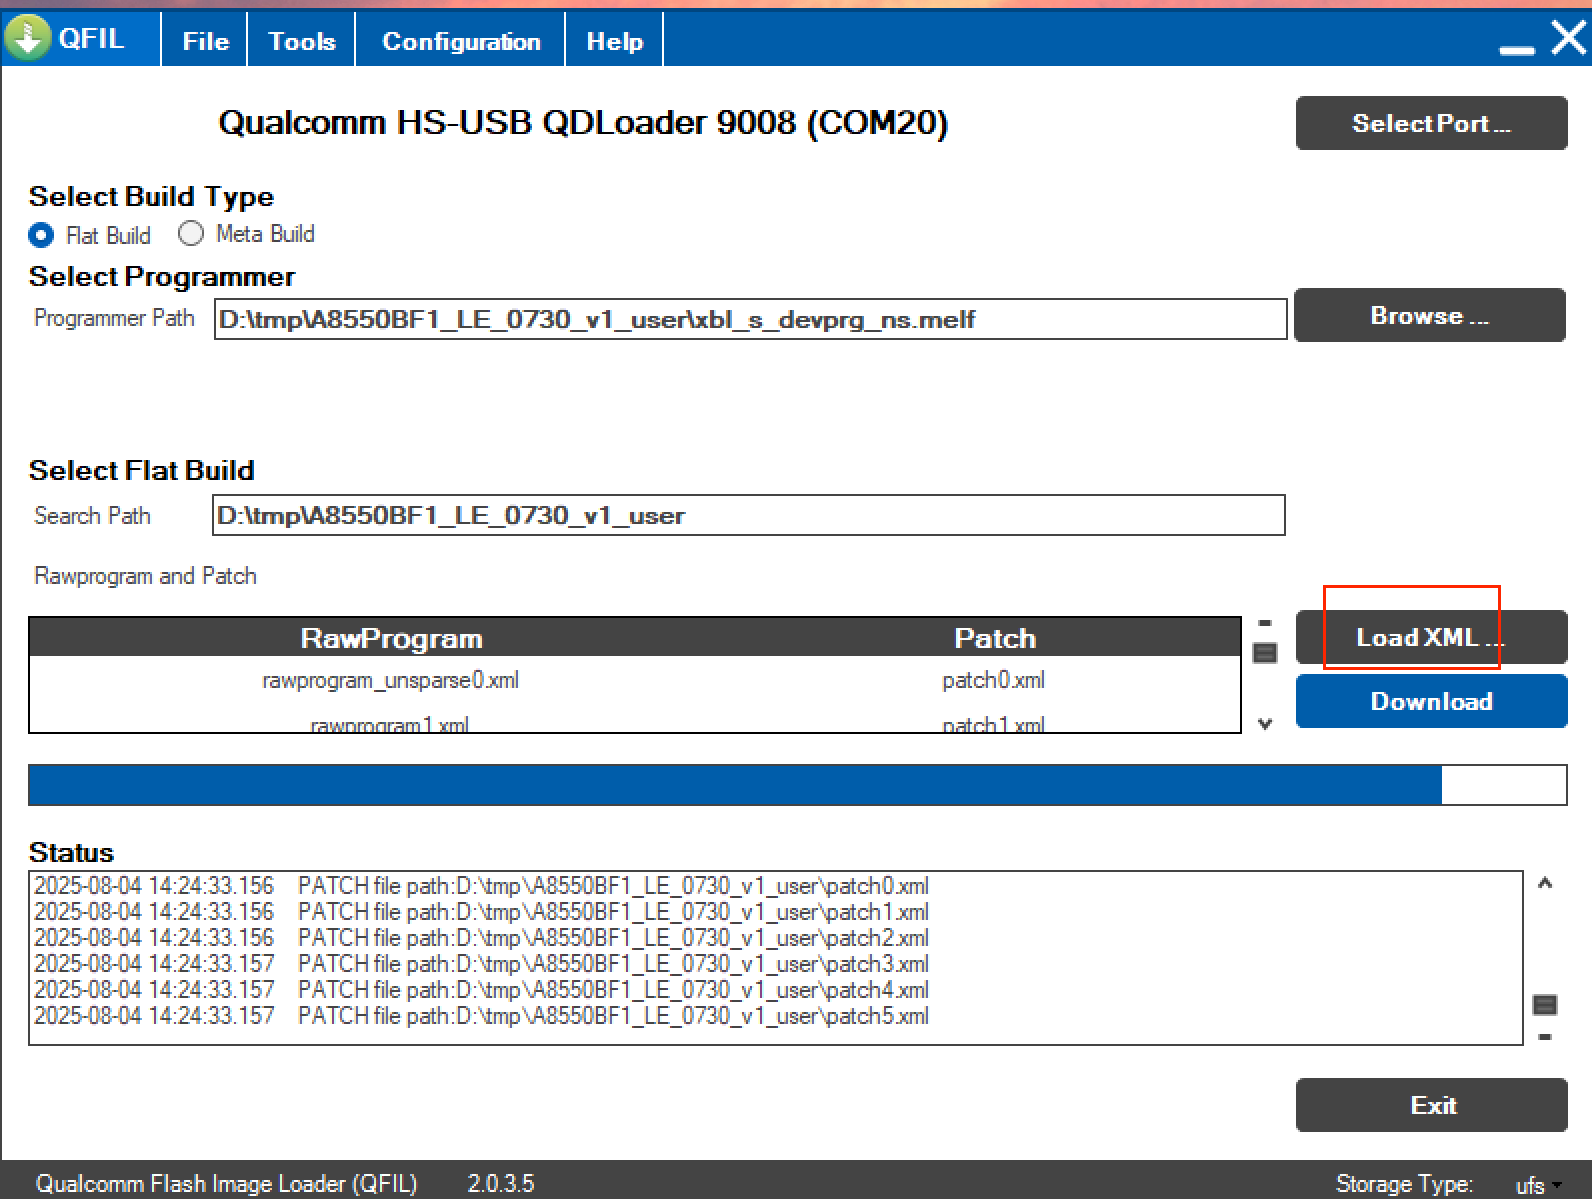
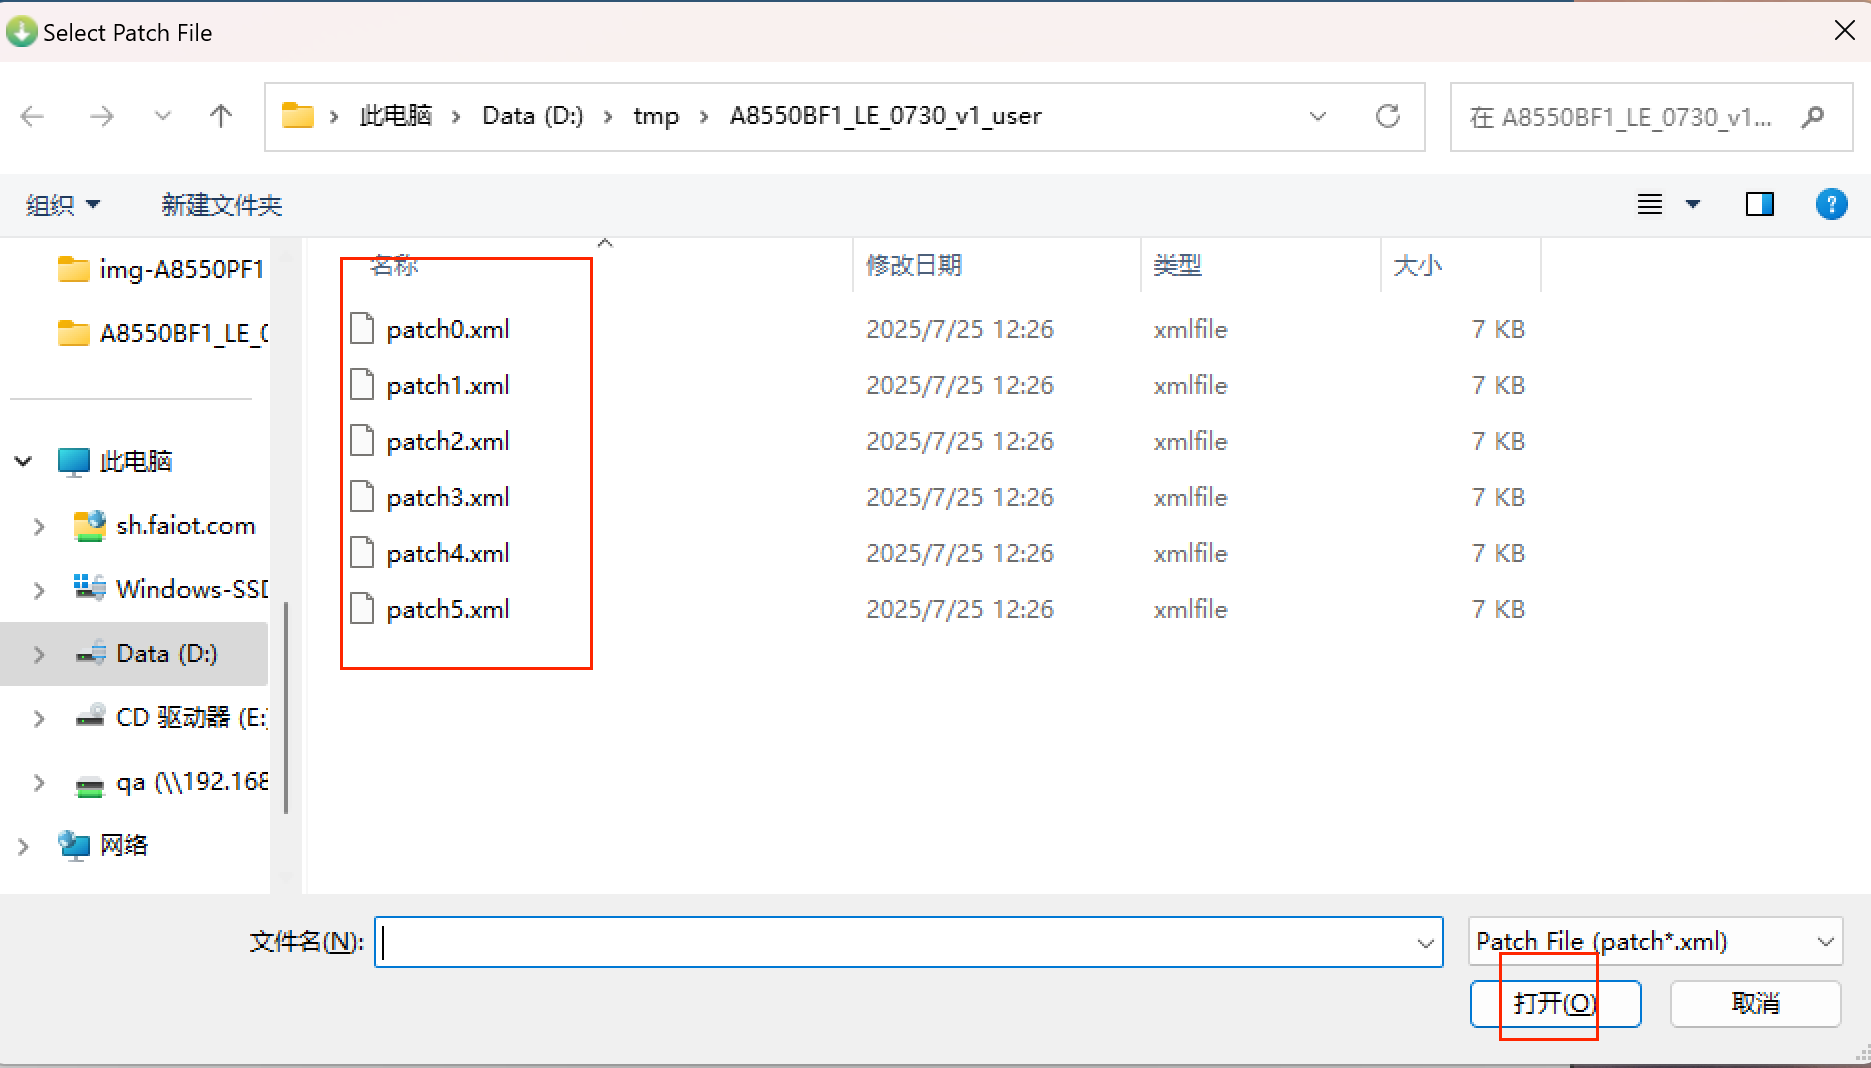
Select Flashing XML File
- Find the "Select Flat Build" item, click
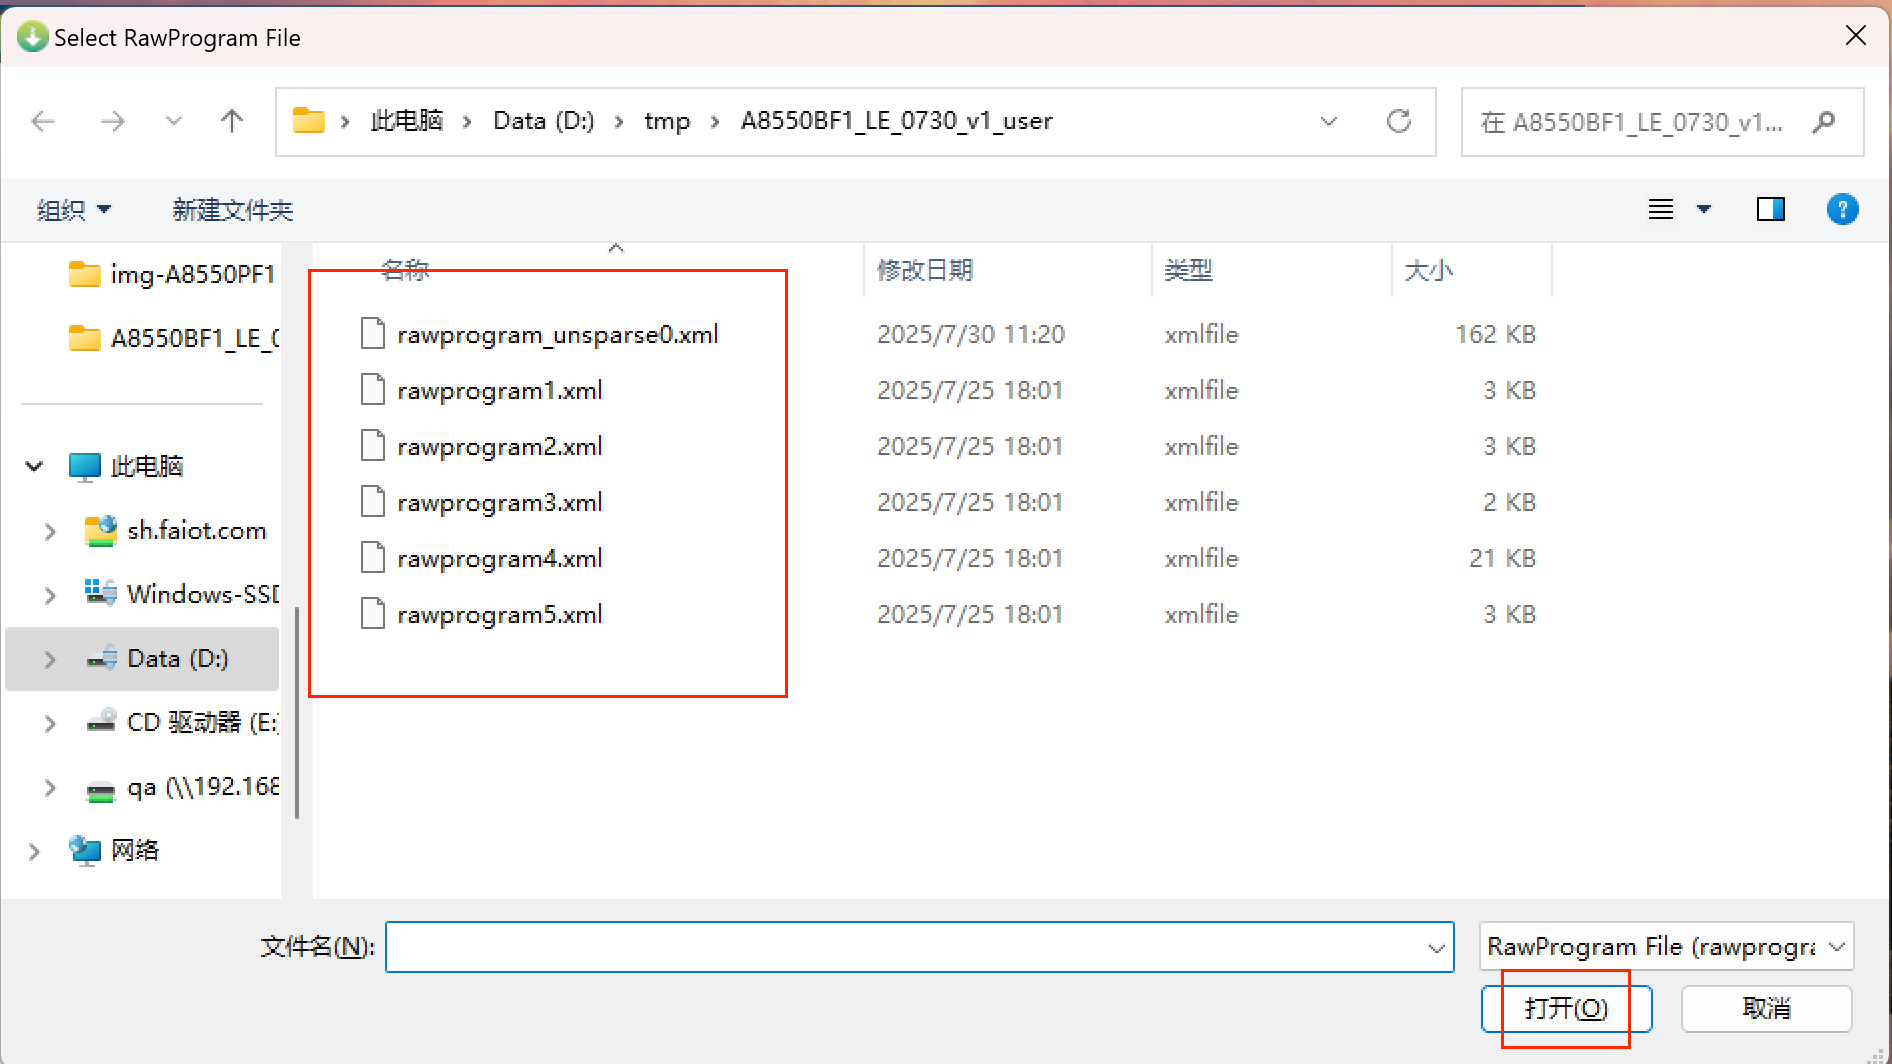
Load XML...below it, and select the flashing XML file.
- In the pop-up window, select All Files and click
Open.
- The interface will automatically open another window. Select "All Files" again and click
Open.
Start Flashing
- After all the above options are selected, click
Downloadto start flashing.
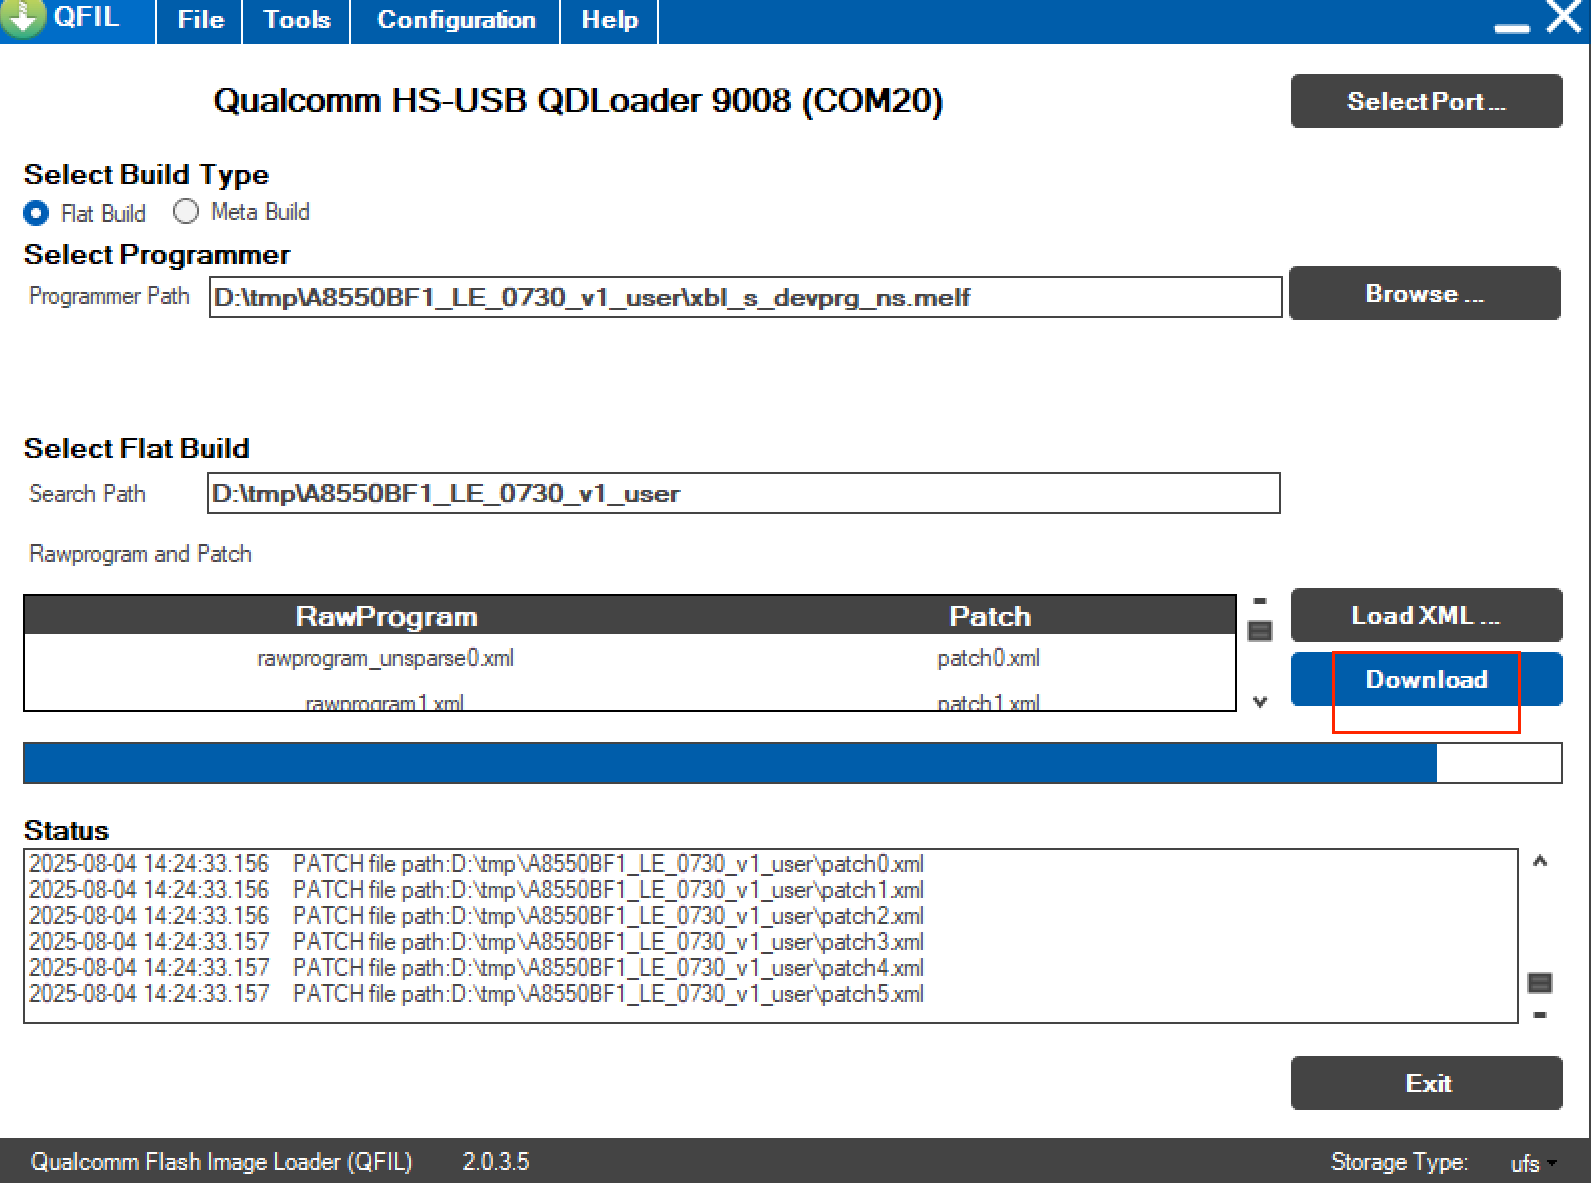
- Wait for about 5 minutes. When "successful" appears, the flashing is complete. If flashing fails, please contact APLUX personnel.
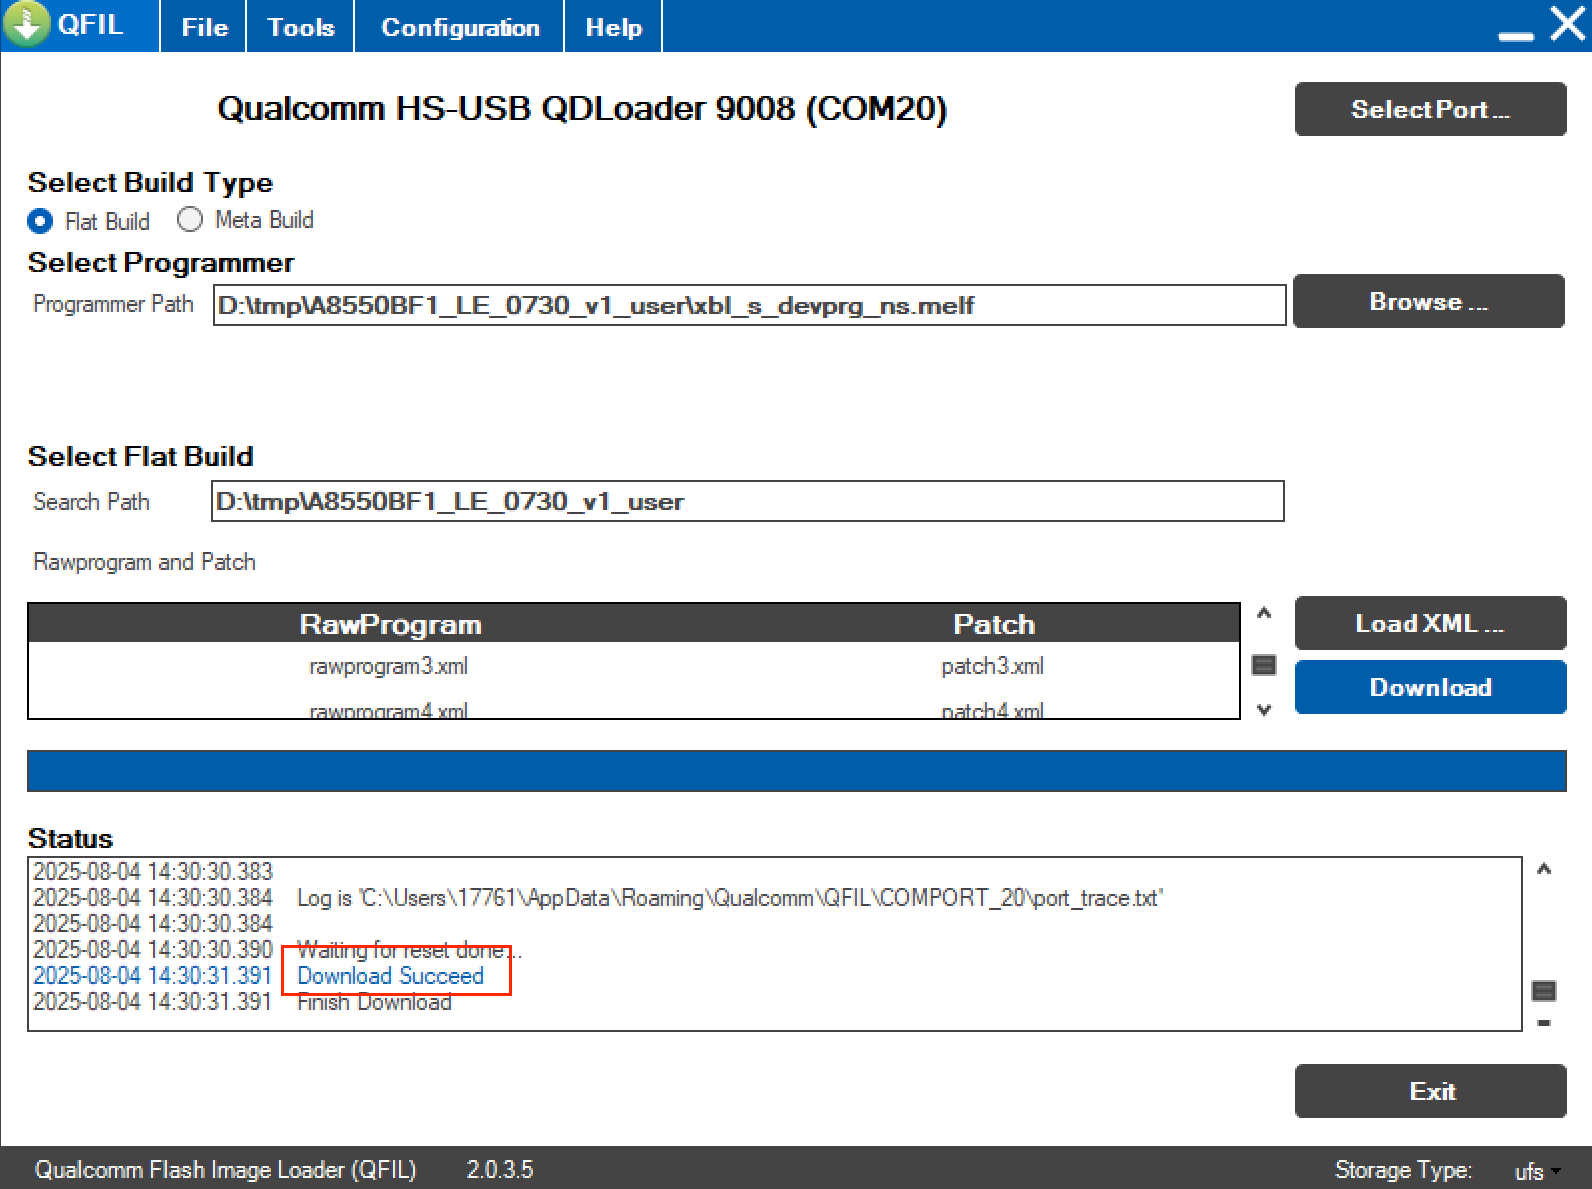
- After flashing completes, the system will automatically reboot. Wait about 10 minutes for system initialization to finish, after which it will be ready for normal use.